(Added spoiler div to the puzzle section) |
(Changed spoiler text a bit) |
||
| Line 20: | Line 20: | ||
[[File:Shadowy_Caves_Balcony.png|thumb|The balcony accessible from the north wall.]] |
[[File:Shadowy_Caves_Balcony.png|thumb|The balcony accessible from the north wall.]] |
||
===Puzzle=== |
===Puzzle=== |
||
| − | <div class="spoilerWarning">'''Note: |
+ | <div class="spoilerWarning">'''Note: The following below describes spoilers for the main puzzle of the area. In addition, it is important to note that the passcode you get as a result of the puzzle only works if you haven't pressed any of the buttons before entering the area. Click here if you want to show or hide the spoilers.'''</div> |
| − | |||
| − | '''Press here to show spoilers.'''</div> |
||
<div class="spoilerContent hide"> |
<div class="spoilerContent hide"> |
||
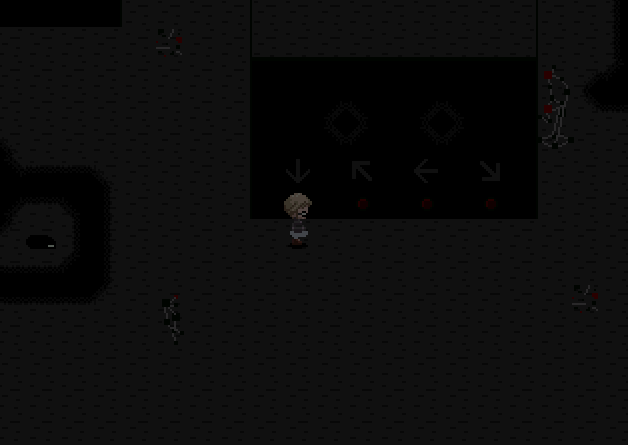
At the center of the main cave is a large pillar with four switches on it, that seems to require a passcode. In addition, there are several rooms, all hidden in some way as well as requiring entrance by chainsawing a wireframe chaser disguised as a cone, that are all shaped like a number and contain an inordinate amount of Puni. If the player has visited this area at least twice, using the Glasses effect will allow the player to see arrows above each switch, that each points in the direction of one of these rooms, indicating the passcode. Each number room is hidden as follows, in order from left to right: [[File:Shadowy Caves Order.png|thumb|220x220px|The arrows, each pointing in the direction of one of the number rooms.]] |
At the center of the main cave is a large pillar with four switches on it, that seems to require a passcode. In addition, there are several rooms, all hidden in some way as well as requiring entrance by chainsawing a wireframe chaser disguised as a cone, that are all shaped like a number and contain an inordinate amount of Puni. If the player has visited this area at least twice, using the Glasses effect will allow the player to see arrows above each switch, that each points in the direction of one of these rooms, indicating the passcode. Each number room is hidden as follows, in order from left to right: [[File:Shadowy Caves Order.png|thumb|220x220px|The arrows, each pointing in the direction of one of the number rooms.]] |
||
Revision as of 21:40, 10 August 2020
| Shadowy Caves | |
|---|---|
 | |
| Basic Info | |
| Original Name(s) |
虚騒 |
| Effects |
None |
| Wallpapers/Puzzles |
None |
| Events |
None |
| Notable NPCs |
Puni, Koro |
| Other | |
| Connecting Areas | |
| BGM |
drm_loop_44 |
| Map ID |
1068 |
| Author | |
The Shadowy Caves is an area accessible from a few areas in the Dream Park, most notably the blue fabric south of the entrance to the wooden maze building.
Features
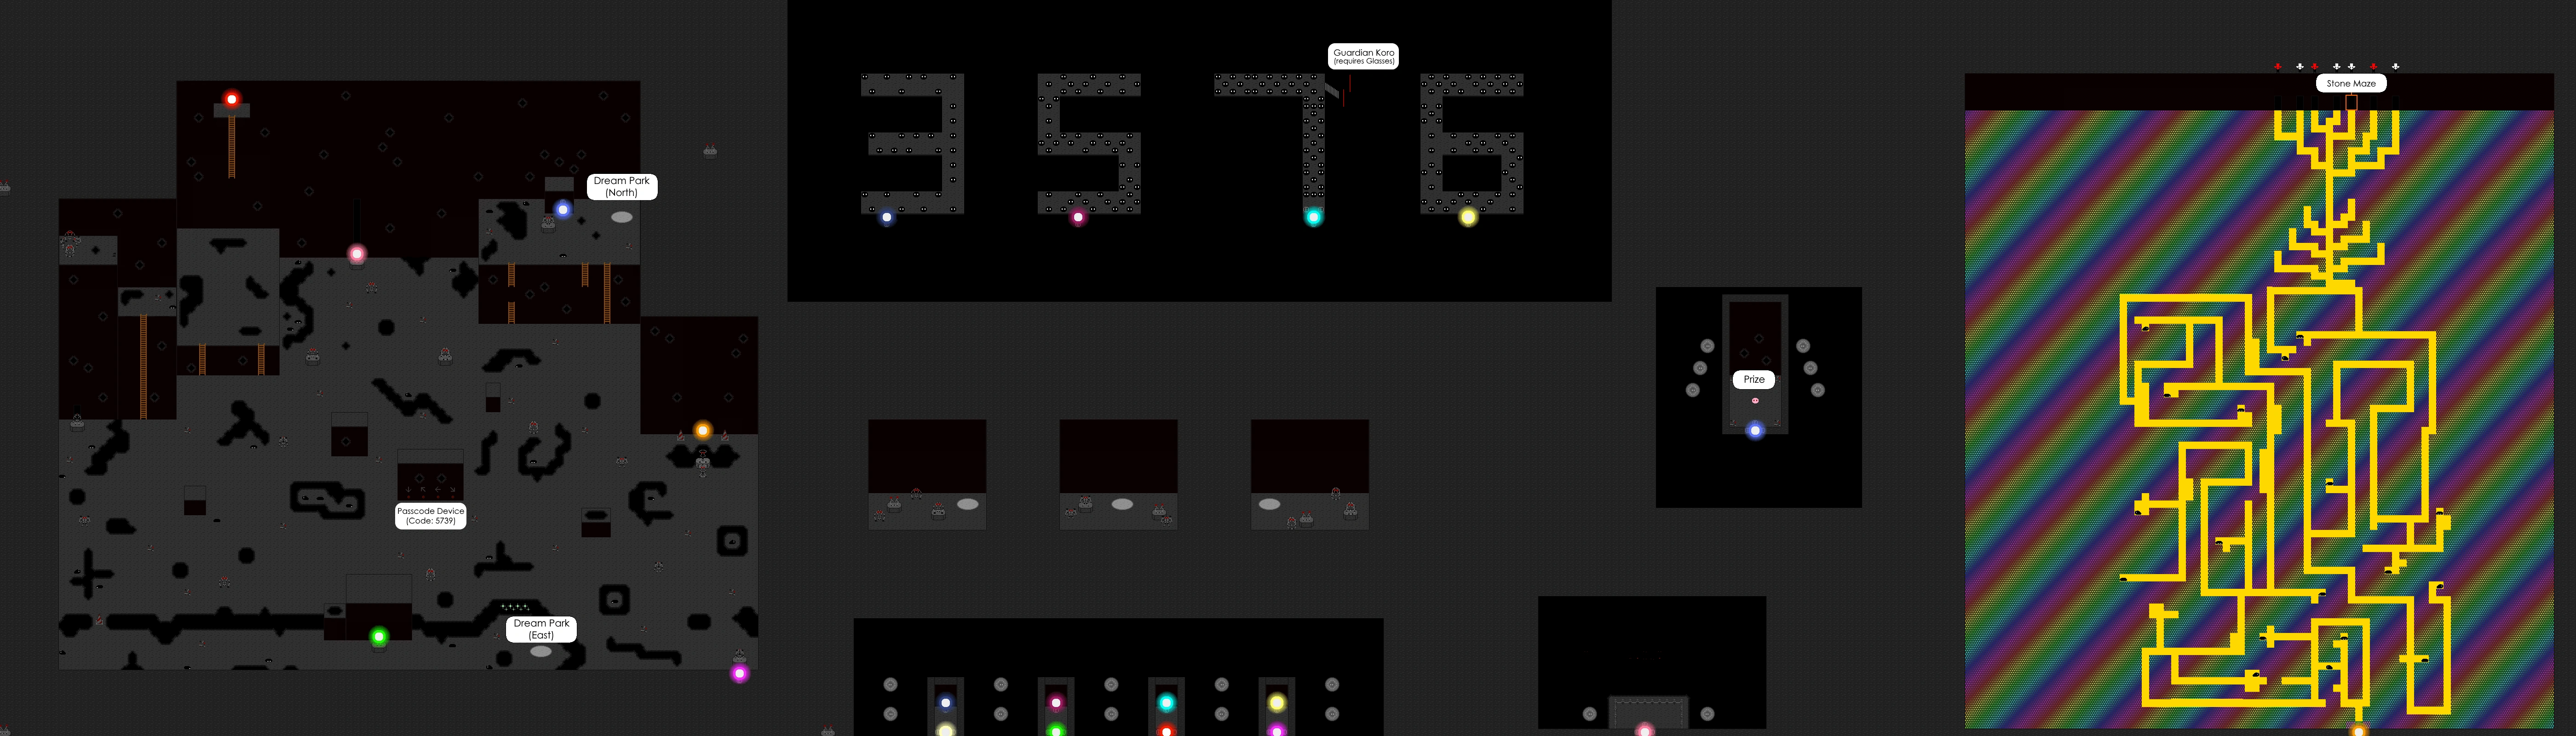

Map of the Shadowy Caves
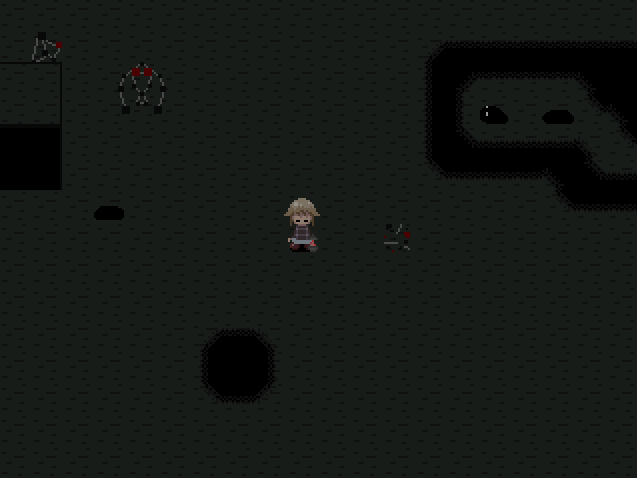
The Shadowy Caves is dark and noisy, filled with interesting variants on the main Chasers that are modeled in wireframe. Despite this fact, it is remarkably large and open. It is littered with dead Puni as well piles of the balls and sticks that make up your foes here. Although the path from the Dream Park is one-way, there are several ways to return, such as using the Bat effect to fly up out of the area when standing under one of the beams of light. There are two of these in the area, one leading to the northern section next to the giant tree, and one leading to the middle of the eastern section. Using this last one will unlock the connection from the eastern section of the Dream Park to the Shadowy Caves.
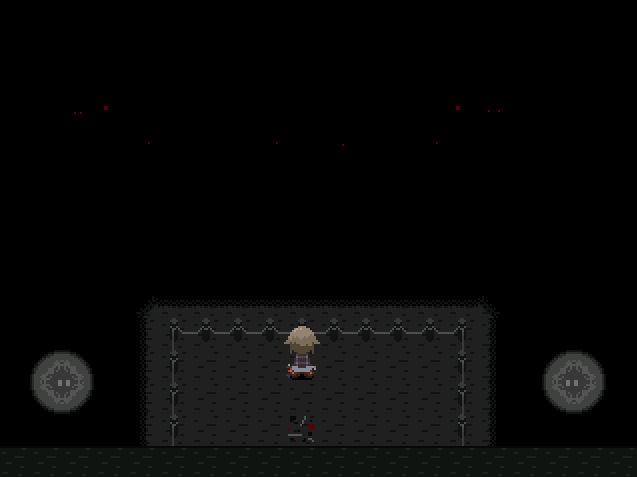
The balcony accessible from the north wall.
Puzzle

")
")
Rainbow Maze
In addition to the major puzzle, there is one more door to be found, flanked by two wireframes disguised as cones. This will lead to an area reminiscent of the Static Maze of the original Yume Nikki, a winding maze where the player cannot see which areas can be walked on and which cannot, once again littered with dead Puni. However, the path through the maze can be found by using the Rainbow effect, causing small dots of light to appear and lead the path through. However, the dots wind around, and there are still dead ends, so it is no brainless task.
Finally, at the end of the maze, the player is presented with seven doors, all accessible from different parts of the passage leading up to it, with arrow NPCs all standing above them. Six of the seven doors will trap the player in an inescapable area; the correct one is the third from the right, which will lead the player to Stone World if they have been there before.
")
")
")
Directions
Nexus → Marijuana Goddess World → Dark Room → Tribe Settlement → Dream Park → Shadowy Caves